|
~ the way
~
I have been fascinated with pit & smoke firing ever since seeing the works of potters like Jane Perryman, and Gabriele Koch. They made me want to bury my pots and resurrect them from the ashes like new. Like Treasure! My first attempts were done alone in a 55 gallon barrel at the BHC Studio around 1994. I punched air holes around the bottom and sides of the drum, packed pots of a few different clay bodies including porcelain, Laguna B-mix, and Claymaker Sculpture- Raku in sawdust mixed with copper carbonate and rock salt. I piled some salty driftwood from a beach near Santa Cruz on top, lit it and left it to burn itself out overnight. The next morning I was thrilled! There were bright reds, deep silvery blacks and wild variations in between. The porcelain had the brightest red flashes and darkest blacks, but many had cracked in the firing. |
|
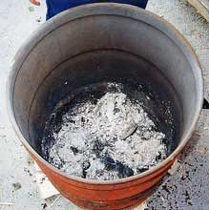
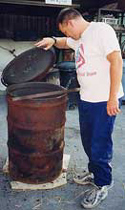
This first picture is of yours truly inspecting the results of a sawdust firing. I love this old oil drum. It had produced some awesome pots! Notice the
pieces of broken kiln shelf below the barrel. Those are there to lift the barrel off the ground to keep it from scorching the blacktop beneath. There are 24 half- inch diameter holes drilled around the base and sides or the barrel to help the air flow and keep the fire burning for complete combustion of all sawdust and wood. I place a smaller trash can lid over the flames down inside the barrel when I am satisfied that it is burning as hot as I want it to. This lid will sit on top of the burning wood and drop down as the wood burns down, to help reflect heat and slow the burning process to keep it in a more reducing firing atmosphere. |
|
|
|
Here is the interior of the sawdust barrel after the firing. Doesn't look like much huh? Well you just wait. Underneath all that burnt white ash are some screaming colors and jet blacks.. I unload after all smoke has cleared and pots have cooled to the touch. I believe that it is during the slow smolder and cooling that a pot really develops it's colors. | |
|
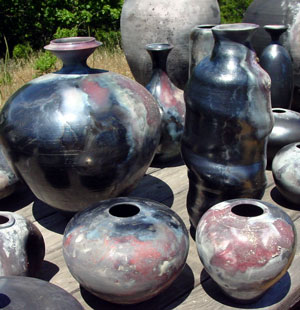
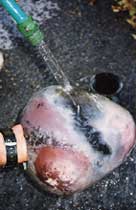
See!
There are those colors! This is one of about 6 to 8 pots I will usually fire in a 55 Gallon drum. After removing the ash covered pots, I immediately wash them up under a hose, and scrub lightly with green scrubby to remove any small particles of ash or resin which sometimes stick to the pot during the firing. A lot of the time, if your pots were burnished really well, they need nothing more than this cleaning to be finished. The bright burnished surface showing off everything for you. Other times I will use a paste wax and seal the pot with it. I was using Johnson's Paste Wax a lot, but recently have been using one called Citrus Shield, because I like the smell better. The buffed out wax coat will really make the pot shine and the colors really pop! |
|
|
|
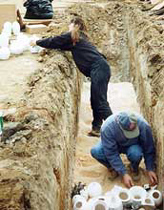
This is the loading of a pit firing which took place next to the ocean in Pescadero CA. In this shot we see potters
Isabelle Hoogland, and Greg Carlson loading a pit which we had dug by a backhoe 4 foot deep, 3 feet wide, and 30 feet long.
It was the longest pit I've ever fired.
Pots were nestled into a six inch bed of hardwood sawdust. Greg and Isabelle did a great job, getting every last pot in the pit. Along with the pots, we loaded bits of copper wire, steel wool, copper carbonate, manganese dioxide, and seaweed right off the beach! We let it burn overnight and unloaded some gorgeous pots in the morning. |
|
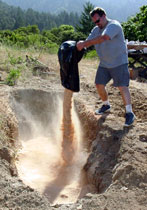 |
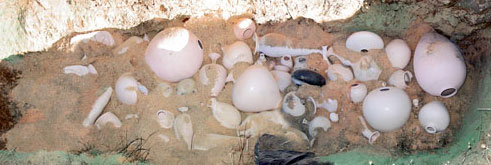
This Pit was dug at a friend of mine's property in Saratoga. It was 10 feet long three feet wide and almost 4 feet deep. Here I am dumping in hardwood sawdust we collected from various cabinet shops, and lumber mills in the area. We put in at least 6 to 8 inches of sawdust to get a nice deep rich black on our pots. I find that hardwood sawdust works best. Along with the sawdust we put 8 pounds of salt, and 8 pounds of copper carbonate, and black copper oxide. | |
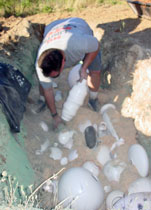 |
The Pots were stacked one next to the other, wall to wall, half buried in the sawdust. We measured this pit size just right. All pots made it in, and there was little room to spare. There were works from 10 artists in the pit. I was the one lucky enough to get down in and stack the pots. When loading a pit, wear a dust mask to block any inhalation of copper or sawdust. | |
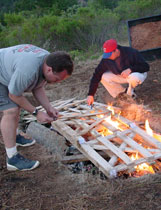 |
Here Ken Wallace and I light the loaded pit with a torch and a few matches. The pots were covered with branches, dead twigs, and grasses, followed by small pieces of wood gently placed over the pots. Breakage can occur even before you fire the pit if you are not careful stacking the wood. The largest pieces of wood were saved for the very top, and a few pallets were used to top it all off. | |
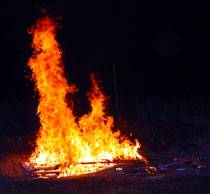 |
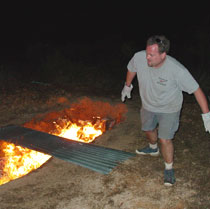
The pit had over 12 ft. flames to start with, but quickly burned down. Then the pit was covered with corrugated iron sheeting to trap the heat and help it burn slow once all the wood was lit and burning hot. The pit was kept uncovered on the ends to allow for enough air flow and left overnight to burn out. |
 |
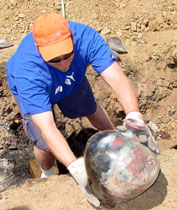 |
The next day, the pit was unloaded. Even after nearly 18 hours, the pit floor was hot enough to melt my sneakers. We used a hose to keep my shoes wet and the floor damp as I worked my way down the pit unloading. Everyone had very nice pots, and there was very little breakage. Here I am unloading one of my spherical poof pots. | |
|
I would like to thank all
my pit firing friends for all their support and help in these
firings. They are quite a bit of work, and each time gets better
and better. I look forward to firing with you all some day if
possible! |
||
| ~ works ~ persona ~ home ~ the mind ~ friends ~ | ||